Popular Posts

Tuesday, December 13, 2011

CROCHET PATTERN SYMBOLS AND DIAGRAMS


Symbols and diagrams are used in simple easy crochet patterns to simplify the patterns and make them easier to follow than fully written instructions. Before beginning a project, read the instructions and become familiar with the symbols in the pattern. Some patterns require special symbols for unique stitches. These will appear beside the diagram with explanations.

Rows and rounds are numbered, with arrows indicating the direction of work. For most patterns worked in rounds, only a section of the pattern will be displayed because this section is repeated several times in simple easy crochet patterns.

Each pattern includes written instructions. As you begin, keep track of your place on the diagrams as well as in the written instructions. Use a sticky note to help you keep track of where you are in the pattern. Marking where you are serves two purposes – it is way to keep track of where you are in the pattern, and, in the case of being interrupted, it keeps your place and you won’t have to hunt where you left off. Take care to notice any special instructions or notes in the written section. This will make it easier for you to follow the diagram alone after the first few rounds or rows. You can also purchase regular round and row markers to be used in your work.

For clarity, written instructions may include symbols such as parentheses, asterisks, and brackets. These symbols are used as signposts to set off a portion of instructions which will be worked more than once.

(Parentheses) enclose instructions which are to be worked the number of times indicated after the parentheses. Parentheses may also be used to enclose a group of stitches which should be worked in one space or stitch.

*Asterisks may be used alone or in pairs, many times in combination with parentheses. Asterisks may enclose a set of instructions to be repeated, or a single asterisk may mark the beginning of instructions which are to be repeated.

[ ] Brackets are also used to clarify and set off sections of instructions. In some patterns, all three-types of symbols are used together. As you can see, there is no need to be intimidated by symbols. These signposts will get you where you are going – to the end of a beautiful finished project.

Happy crocheting…

CROCHETING FOR A VICTORIAN NURSERY

One of the charms of a proper Victorian home was its nursery. The purity and innocence of children were celebrated in Victorian times, and life in the nursery was structured, protected and genteel. In this bright and cheerful room, a child spent most of his time from birth until he could be depended upon to behave with grace and charm at mealtimes and other social occasions.

British families were the first to set aside and decorate a special room for the younger set. This room usually contained a crib, high chair, walker, wash stand with pitcher and bowl, and a bed for the nurse, nanny or governess. The nursery tradition caught on in this country in the mid-nineteenth century, and by the end of the Civil War, affluent Americans everywhere sought to provide the sheltered, structured life for their children that the formalities of the time demanded.

The formalities of the last century have all but disappeared from our lives, but we are rediscovering a fondness for the romance of Victorian-style decorating. Crocheted pieces, especially those made with thread from a simple easy crochet pattern, fit perfectly into Victorian décor.

If you want to extend your Victorian décor in your baby’s room, a simple easy crochet pattern can be found in crochet instructional books in yarn shops and other stores that sell yarn and accessories. With the addition of lace curtains, floral wallpaper, and a modern Victorian-style crib, an heirloom crochet set can be the highlight of your baby’s nursery.

A best time to enjoy vintage décor is while the baby is tiny. This is the time when you can safely place charming touches like a dried flower arrangement and an antique doll in the nursery. Once baby is mobile, fragile or potentially dangerous items should be placed well out of baby’s reach or removed from the room. But with some planning, your nursery can still retain its Victorian flavor even with a toddler about and on the move. Reproduction wallpapers, sturdy antiques and flea market finds can be combined with newly purchased and handmade pieces to create a room that will be safe as well as elegant and unique.

When planning nursery décor, the first item chosen is usually the crib. It may be tempting to use an antique crib, bassinet or cradle, but these are often unsafe. It is best to choose a new or nearly-new crib to insure your baby’s safety. Most crib manufacturers today make Victorian style cribs to suit every taste and budget.

A white wicker bassinet, a mainstay of baby care for generations, is perfect with Victorian décor. It can be left plain or draped elaborately with ruffles and lace. Affluent Victorians preferred elegant trappings for their tiny heirs, trimming the bassinet in satin swags and Battenberg lace.

Check a yarn shop or on line to find a simple easy crochet pattern for a delicate and lacy throw for the baby’s room. It would have been right at home in any proper 1885 home. Today, we have the best of all worlds – antique and reproduction nursery furniture and decorations, needlework skills to create elegant decorating accessories, and modern conveniences nonexistent in 1885.

Have fun crocheting your antique item…

Saturday, December 10, 2011

STIFFENING CROCHET ITEMS

A Christmas tree covered with dainty thread snowflakes can be enchanting, but not if those snowflakes are sadly drooping from the tree’s branches. To look their very best, snowflakes and many other decorative thread items require some sort of stiffening process.

Some items, such as simple easy crochet doilies or place mats, just need enough starch to keep them lying nice and flat. Use a little spray starch, a pressing cloth, and a warm iron on these projects, and you are done.

Other crocheted treasures call for stiffer measures. Doilies with ruffled frills benefit from heavier starch than their flat counterparts to keep their ruffles crisp and standing at attention. Flat items that hang, like Christmas snowflakes, usually need a heavy application of stiffener to keep them looking spiffy and looking pretty on your tree.
Boxes, baskets, angels, bells, and other three-dimensional items must be able to stand up on their own, so they need a strong dose of stiffener as well.

To stiffen simple easy crochet patterns of crocheted items properly, you will need a form, plastic wrap, rust-proof pins, and a stiffening solution. The form depends on the project to be stiffened. For a flat item, use a blocking board, an ironing board, or even a thick piece of cardboard or plastic foam. Cover the entire surface with plastic wrap to keep it dry, especially if you are using plastic foam, which may change shape if it gets wet.

For three-dimensional items, look for something that is the correct shape to place your project over. Foam balls covered in plastic wrap, or use balloons that you inflate to the appropriate size and then pop the balloons once the project is dry. This procedure works well for round or oval shapes. You can also stuff your project with crumpled plastic wrap until it is the shape you desire. If you use a glass or plastic bowl to shape a crocheted bowl or basket, you can later use the same bowl as a waterproof liner.

Rust-proof pins are essential for holding your crochet item in place until it dries. Make sure the pins will not rust, or you may wind up with discolored spots on your prized creation. When inserting pins between the stitches of your project, be careful not to split the threads. Make sure the curved parts are smooth, straight parts are straight, and symmetrical components are equal. Pin spaces and picots open if necessary, and use pins to create curves, points, and angles. Be generous with pins to make sure all components of your crocheted items will be held in place until it is dry. When I lay out a doily to be starched, I use a cloth or plastic measuring tape to measure it from the center, making sure it is pinned evenly from the center to the outside.

There are four primary methods of mixing solutions to stiffen crocheted projects. Each has its own advantages, so choose the method that will give you the effect you want. Whichever one you select, be sure to always let your project dry completely before removing any shaping forms or pins. When it is dried, I test the stiffness of the doily before removing all the pins. If it needs to be stiffened more, spray it again with your stiffing solution.

Commercial starch gives your projects more body than spray starch. Mix the starch following the manufacturer’s directions, using a heavy solution for ornaments and decorations. Use a clean, soft paintbrush to apply a coating of the starch. For a heavier application, put the starch into a bowl and dip your project. I like to put my doily on the board while it is still dry, making sure it is shaped the way it needs to be, especially for round doilies. They I spray it with a starch solution and let it dry. Commercial starch is easy to use and it washes out if you launder the piece.

White glue can be used to stiffen projects. Mix the glue with equal parts of water, and mix thoroughly, and paint it onto your project using a clean, soft paintbrush. If you want a softer finish, use a little more water in your mixture. White glue is readily available and gives a firm finish, but it isn’t waterproof.

Commercial fabric stiffener provides the most durable finish for your projects. However, you must keep in mind that it is permanent and will not wash out if you make a mistake in shaping your project or want the option of washing seasonal ornaments and storing them flat. Purchase this product at craft and hobby stores and follow the manufacturer’s directions for mixing and using the stiffener. After the stiffener has dried completely, shiny flakes of excess stiffener can be brushed away with a stiff toothbrush, and then an acrylic spray can be applied to help protect your project from heat and humidity.

What's New at CreateForLess

CROCHET TIDBITS


New Year's Resolution Sale

When working with dark-colored yarn, use a light-colored hook. When working with light-colored yarn, use a dark-colored hook.

Keep a basket handy for saving odd and ends pieces of thread and leftover skeins or ball. Use these leftovers to crochet small motifs of varying colors and simple easy crochet patterns. Join these motifs to create unique and colorful dresser scarves, tablecloths, bedspreads, or anything you can imagine. Or, use them individually as small doilies, coasters, bookmarks, etc.

Variegated indicates thread or yarn that changes from one color to another (baby pink to white to baby blue). Ombre` indicates thread or yarn that is all one color but in varying shades (off white to light beige to light brown to a deeper brown).

When sending a greeting card to a friend, enclose a small crocheted item as a special gift. Small doilies, bookmarks, coasters and ornaments make inexpensive and delightful gifts that may be enjoyed for years.

When you decorate your home for the Christmas holidays, don’t overlook the possibilities of crocheted doilies. Cluster five or six small red, white and green doilies in a pretty group on the dining room or kitchen table. Add a round bowl of greenery and holiday-colored flowers for a unique centerpiece.

Trim your tree with only handmade crocheted Christmas ornaments. You can make many ornaments from larger patterns by substituting baby yarn or crochet thread and by using a small hook.

When it comes the time of joining motifs for tablecloths, bedspreads or any other items made from simple easy crochet patterns, it doesn’t have to be complicated. If you want your work to lie flat, put all four corners together with a slip stitch. If you want a decorative joining that will stand up, use a single crochet.

When a crocheted circle curls it means you are not increasing enough. If you increase too much it will ripple. There are two kinds of “working in round”: (1) Crochet each complete row, join, and then chain up the number of chains as given in the simple easy crochet pattern. (2) Crochet each row; do not join, but count rounds by marking each round. This method gives a smoother finished item.

To keep your work from curling, always chain before you turn. Threads and yarns, except linens, are all plied to be chained before turning. Also, turn your work away from you and to your left (except when crocheting cables), so it will go with the correct twist of your yarn.

When you are purchasing thread or yarn for a potential project, carefully check to make certain you are getting fresh stock and the same dye-lot.

Always wash your hands before working on any thread project to reduce natural oils on the skin that will discolor the tread and may, over tine, cause it to deteriorate. After completion , gently launder your crocheted item with a product recommended for delicate washables, such as Orvus or Woolite. Stains may sometimes be removed by rinsing small items with lemon juice and water, and exposing the crocheted item to sunlight.

When crocheting with black yarn or other dark colors, it will be easier to see your work if you lay a light-colored cloth (such as a purchased cloth napkin) over your lap when crocheting.

To utilize the sales in your local craft store, keep a notebook in your purse of the projects you plan on making, along with all the necessary supplies and amounts needed. By doing this you will never forget the needed material for the project.

Hope these hints were helpful…

Wednesday, December 7, 2011

CROCHING GRANNY SQUARES

With today’s new fashion yarns in a host of fibers and a little guidance on how to crochet granny squares, it can still be part of a fashionable garment or an afghan or throw.

There are many reasons to choose to make granny squares when you are learning to crochet. They use a relatively small number of stitches, which makes them ideal for a beginner. They’re also very portable. You can tout around your yarn and crochet hook almost anywhere you will be spending time, such as waiting at the doctor’s or dentist’s office.

Once you have decided to crochet a granny square afghan, you need enough worsted weight yarn to complete the size you choose, either in one color or as the total of several colors. Choose a yarn that feels good to your hands. If your project is for a baby, find a yarn that is machine washable. You will also need to purchase your pattern before buying the yarn. The pattern will tell you how much yarn it takes to make that particular pattern. Otherwise you may end up with too much yarn, or maybe not enough yarn.

You will also need a crochet hook in a size I or J. If you choose a bulkier yarn, you will need a larger hook. Finer weight yarn like a baby or sport yarn will require a smaller hook. Crochet hooks are made from metal, plastic, wood or bamboo, so handle several different types and choose the one you are most comfortable with. Plastic may be the least expensive, but if it doesn’t feel right in your hands, it is a waste of money. A six or seven-inch hook is perfect for crocheting granny squares. You will also need a bag for your work and a small pair of scissors.

Finally, you need to understand gauge, which is the number of stitches per inch. You must sometimes understand the number of rows per inch as well. Simple easy crochet patterns will specify the gauge. Make a test swatch, using 20 stitches and 20 rows, and check to see if your finished gauge is the same as what’s specified. If it is not, try using a larger or smaller hook or tightening or loosening your tension (how tightly you make your stitches).

The main difference between granny squares and other forms of crocheting is that granny squares are crocheted in the round rather than in rows. Simple easy crochet patterns may use single crochets or bobbies for interest, but most basic granny squares are mostly double crochet (DC) stitches. All squares begin with a chain and then joined end to end to make a ring, then continue with rounds of single crochet (SC) stitches or (DC) stitches with a chain stitch to form each corner. You can make all rounds the same color, or use different colors to use up that leftover yarn.

You can find simple easy crochet patterns online that sometimes include photos with the pattern or scheme. One online source to get easy simple crochet patterns is www.amazon.com. The addition of photos allows you to follow along with a visual representation of what each symbol should look like in the finished form. You will need to purchase your pattern before you purchase the yarn.

When you have completed your granny square, dampen it slightly and pin it into shape on a padded surface or a blocking board that you have made. Weave in any loose yarn ends from joining. Now make the rest of your squares and join them together to make a granny square afghan.

Love your project of Granny Squares..

CROCHET DIFFERENCES FROM KNITTING

One of the most obvious differences is that crochet uses one hook while much knitting uses two needles. In most crochet, the artisan usually has only one live stitch on the hook (with the exception being Tunisian crochet), while the knitter keeps an entire row of stitches active simultaneously. Dropped stitches, which can unravel a fabric, rarely interfere with crochet work with crochet work, due to a second structural difference between knitting and crochet. In knitting, each stitch is supported by a corresponding stitch in the row above and it supports the corresponding stitch in the row below, whereas crochet stitches are only supported by and support the stitches on either side of it. If a stitch in a finished crocheted item breaks, the stitches above and below remain intact, and because of the complex looping of each stitch, the stitches on either side are unlikely to come loose unless heavily stressed.

Round or cylindrical patterns are simple to produce with a regular crochet hook, but cylindrical knitting requires either a set of circular needles or three to five special double-ended needles. Many crocheted items are composed of individual motifs which are then joined together, either by sewing or crocheting, whereas knitting is usually composed of one fabric, such as entrelac.

Freeform crochet is a technique that can create interesting shapes in three dimensions because new stitches can be made independently or previous stitch almost anywhere in the crocheted piece. It is generally accomplished by building shapes or structural elements onto existing crocheted fabric at any place the crafter desires.

Knitting can be accomplished by machine, while many crochet stitches can only be crafted by hand. Although some simple easy crochet patterns can emulate the appearance of knitting, distinctive crochet patterns such as the Granny Square cannot be simulated by other methods. The height of knitted and crocheted stitches is also different: a single crochet stitches twice the height of a knit stitch in the same yarn size and comparable diameter tools, and a double crochet stitch is about four times the height of a knit stitch.

Crochet produces a thicker fabric than knitting, and tends to have less “give” than knitted fabric. It also uses approximately a third more yarn for a comparable project than knitted items do, since each crochet stitch is composed of several loops versus a single loop as in knitting.

I hope this information was helpful to you.

Tuesday, December 6, 2011

CROCHET CLEANING AND STORING

With all of your precious time and effort poured into your crocheted creation, you certainly don’t want it to be ruined the first time it is washed. Pay special attention to the materials you will be using and keep records for proper care, then you can minimize the risk to your handmade treasure.

If the instructions of your simple easy crochet pattern call for more than one color of yarn, type of yarn, or material, be sure the care instructions are the same for everything you use. For example, if you crochet edgings to apply to purchased kitchen towels and/or bathroom towels, the laundry care for the thread used to make these edgings should be the same as that for the towels themselves. If you have a sweater that is crocheted with a nubby yarn but assembled with a smooth yarn, the washing instructions for both yarns should be the same.

Be sure the materials you select for a project are appropriate for the way the finished item will be used. You might choose a dry-clean-only wool yarn to create an elegant sweater jacket; but if you are crocheting a child’s pullover, a washable cotton or acrylic yarn would probably be a better choice. Dishcloths need to be machine-washable in hot water. You may enjoy using an exotic textured yarn that is definitely dry-clean-only for a seldom-used guest room afghan, but an afghan for the kids’ room needs to be a durable, machine-washable acrylic.

Keeping accurate records of the materials and care instructions for each project makes it easier to launder crocheted projects safely and can extend the life of the items. A journal of the projects that you crochet from simple easy crochet patterns is an excellent place for storing this information. If keeping a journal is not your style, other record-keeping systems such as index cards or file holders work just as efficiently. As long as you have this important information in a place you can find easily, you’ll never have to worry about how a particular project needs to be taken care again. I have another blog about journaling on this website and maybe it will be helpful to you, too.

For wearables and gifts, always make care labels. The quickest and easiest way to make a care label is to simply write the care instructions on an index card and include it in the box with the crocheted gift. This works especially well for three-dimensional objects such as toys, or for starched decorative items, or for open-work projects like tablecloths and wearables where a sewn-in label might show through to the right side of the item. Another way to make labels is that you can purchase a laundry marking kit that includes a permanent, washable laundry marker and tape; you write directly onto the tape, cut it to size, and then fuse it to your project with a hot, dry iron. Instructions are included with the kit.

Since displaying all your crocheted goodies all at one time is next to impossible, knowing the basics for storing your treasured is a smart ideas – with proper care, they will stay spiffy and be ready to come out of the closet in a jiffy. Here are a couple simple guidelines that need to be remembered. First, always make sure your projects are squeaky clean before storing them. If a crocheted piece is soiled when it is stored away, it may take a miracle to remove the stains when the item is pulled back out.

If at all possible, store your items flat. Be careful not to stretch or distort crochet, and if folding is necessary, refold your articles every few months to minimize permanent creases. Do not store your pieces in plastic bags. The fibbers of the yarn or thread cannot “breathe” when wrapped in plastic, so mildew-causing moisture is easily trapped. Instead, store your treasures in cardboard boxes lined with acid-free tissue paper or in clean cotton pillowcases. My son works in a cardboard factory and I had him make me a very large, shallow box so I could lay all my doilies completely flat. It was wonderful! A cedar chest is a great place for storing woolens, but beware of cedar when you store cotton items. The oils from the wood can permanently stain cotton. If you need to store cotton articles in your cedar chest, make sure they are safely wrapped in layers of acid-free tissue paper.

Be kind your precious crocheted items…

EXPERIMENTING WITH CROCHETING

One of the most wonderful things about crochet(and there are many) is its versatility. We can make anything from intricate, delicate laces to warm-and-toasty afghans, from stylish apparel to practical household accessories, all with the same basic stitches. It is as simple as changing our hook sized and working material. And then you will need a simple easy crochet pattern to work on.

As a matter of fact, it is fun to experiment by taking a pattern stitch or motif that has been worked in a material from one end of the spectrum and working it in something from the opposite end. A little thread crochet flower worked in worsted weight yarn might become part of a lovely floral afghan; conversely, a flower motif from an afghan could be the source of inspiration for a dainty doily
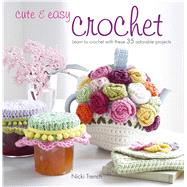
Cute and Easy Crochet : Learn to crochet with these 35 adorable Projects
It is amazing what changing the type, color, or weight of yarn can do. Sometimes the results are extremely rewarding, and other times it is disastrous. But even the disasters serve a purpose because we learn from them and often times they serve as an inspiration for a later triumph.

Several years ago, a publication designer designed a sweater pattern for a lovely textured sweater from a simple easy crochet pattern. Later, a disgruntled crocheter complained that there was obviously something wrong with the instructions because her sweater looked nothing like the picture, and she sent a swatch of her work as evidence to the designer. Actually, the instructions were absolutely accurate, but one look at her swatch revealed the source of her problem. For a sweater that had been worked in a simple, smooth, sport weight yarn, she chose a lovely chenille; its rich texture completely obliterated the pattern stitch.

So if you are going to experiment by substituting one thread or yarn for another, play with some of those scraps of thread or yarn that you have stashed around the house before you to out and invest a small fortune in a yarn or thread that is not the called-for material. If you do not have a mountain of odds and ends to choose from – and what self-respecting, die-hard crocheter doesn’t – then go out and buy just one skein for experimental purposes only. If you like the results go back and purchase all you need for your simple easy crochet pattern; if you don’t like, file it away and remember what you have learned.

Most of us make mistakes when it comes to crocheting, but all of learn something new every day. To help with the clutter, purchase clear plastic freezer storage bags or a storage bin, they are excellent for storing all your triumphs and disasters. Be sure to attach a tag to each swatch giving pertinent information, i.e., hook size, type of yarn or thread and the instructions for the pattern stitch. Then punch holes in the edge of the bag and file it away in a large binder for future inspiration.

Enjoy a good Experiment with some of these hooks below, and see what develops.